To configure the Enabler Embedded Integration with Idealpos, complete each of the steps outlined below:
Note!
The below process outlines the configuration of Enabler in Idealpos.
The overall end-toconfiguration of settings within the Enabler Embedded Console Interface are outside the scope of the Idealpos User Guide.
Refer to ITL for further assistance with configuration on the Enabler Embedded Console.
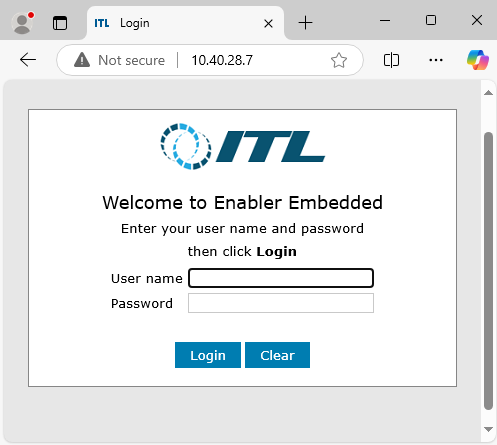
The configuration to the Enabler Embedded Console can be accessed by opening a Web Browser and accessing the Enabler Embedded by entering its IP Address into the URL path.
The Enabler Embedded Console will display a login page - enter the Username and Password.
Note that changing settings in the Enabler Interface should only be done by experienced staff that understand the repercussions of the changes that they are making.
The .NET Framework 3.5 is required for the Enabler Embedded Interface.
Note that some POS Terminals and/or Back Office PCs may already have the .NET Framework 3.5 installed and if this is the case, this step can be skipped.
To enable the .NET Framework, go to: Start > Type in "control" using the keyboard and the Control Panel should be displayed in the search results.
Click on the Control Panel in the search results to open it.
Alternatively, right click on the Windows Start button and select "Run" > enter "control" (without quotes) into the Open field > Press OK.
If the Control Panel is being viewed by Category, select "Programs" > Turn Windows features on or off.
If the Control Panel is being viewed by Large Icons or Small Icons, select "Programs and Features" > Turn Windows features on or off.
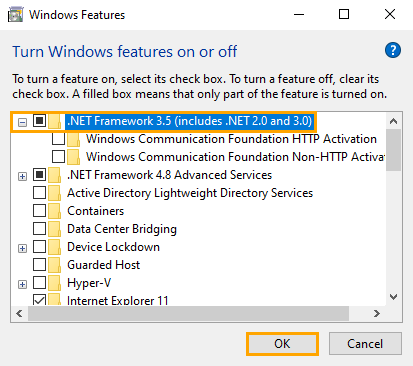
Ensure that ".NET Framework 3.5 (includes .NET 2.0 and 3.0)" is enabled.
If this option is not enabled, enable it.
Press "OK" after enabling the .NET Framework 3.5 option.
Note!
The Windows Communication Foundation HTTP/Non-HTTP Activation options are not required and can remain unselected/disabled.
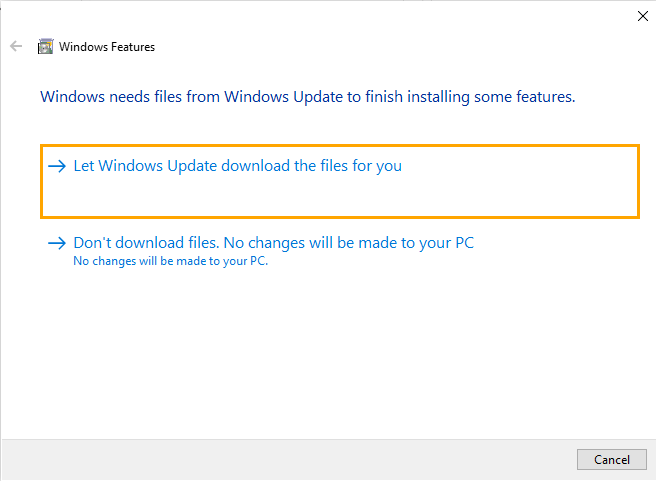
Windows will display a prompt to download files from Windows Update to finish installing some features.
Press the option to "Let Windows Update download the files for you".
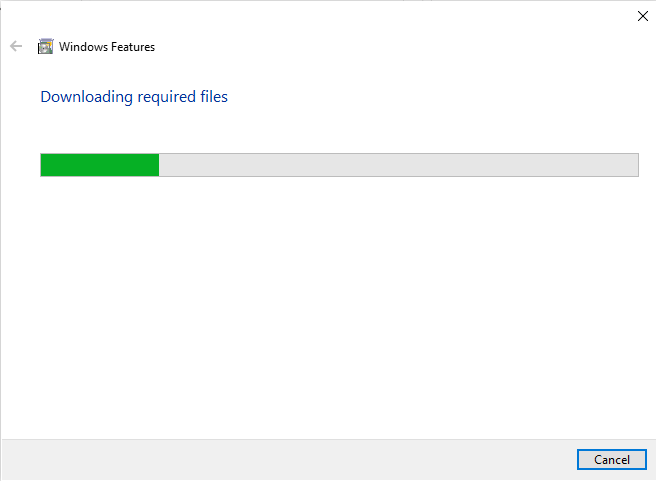
Windows will then download the required files from Windows Update
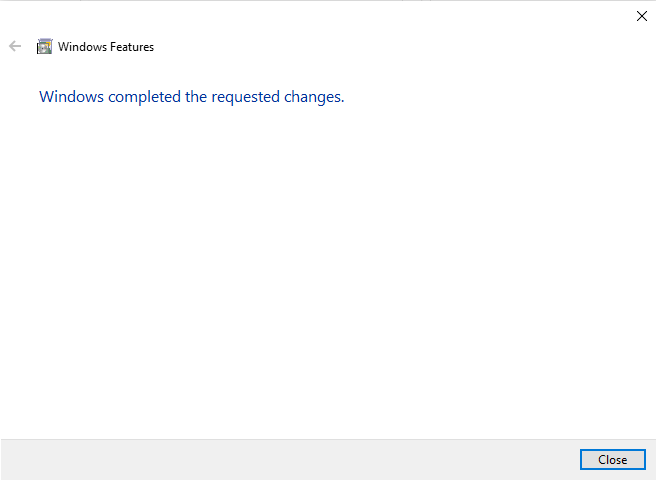
After the files have finished downloading and after .NET Framework 3.5 has installed, Windows will display a prompt "Windows completed the requested changes".
Press "OK" to close the prompt.
While it isn't required by Windows, it is recommended that the PC or POS Terminal be restarted for the change to take effect.
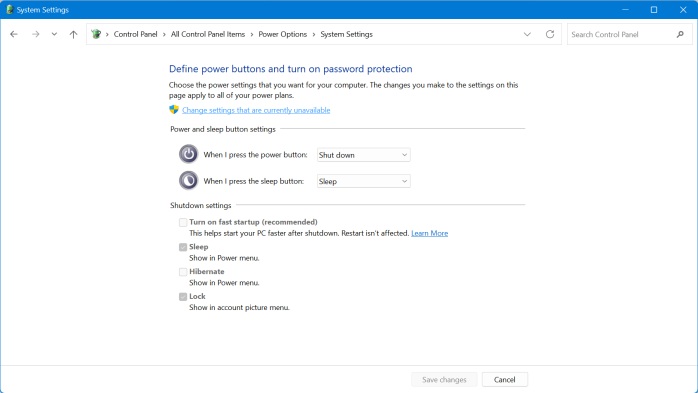
Fast Startup must be disabled on Windows 10/Windows 11 systems when setting up your Enabler system.
If left ON, this may cause unpredictable results as your Enabler PCI/Express Card hardware and software will not initialise correctly once the PC performs a shutdown or reboot.
The Enabler Setup will disable Fast Startup during setup if required but will require a system restart to complete.
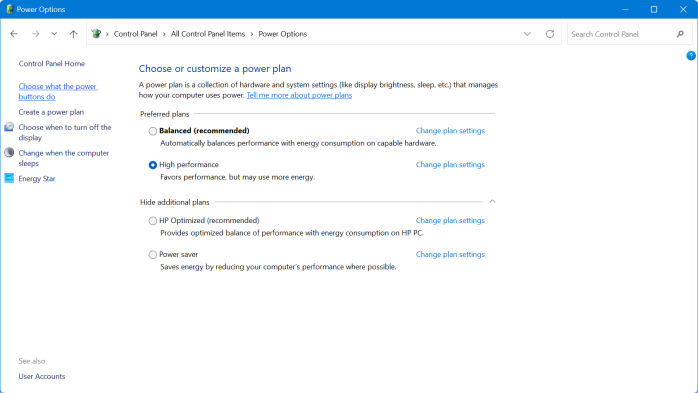
If required, Fast Startup can be manually disabled by going to Control Panel > Power Options > Choose what the power buttons do.
Then select Change settings that are currently unavailable > ensure that "Turn on fast startup (recommended)" is disabled.
The Enabler Embedded Interface will need to be enabled for each POS Terminal that requires access to this interface.
Contact Idealpos or your Idealpos Reseller to purchase the Enabler Embedded Interface.
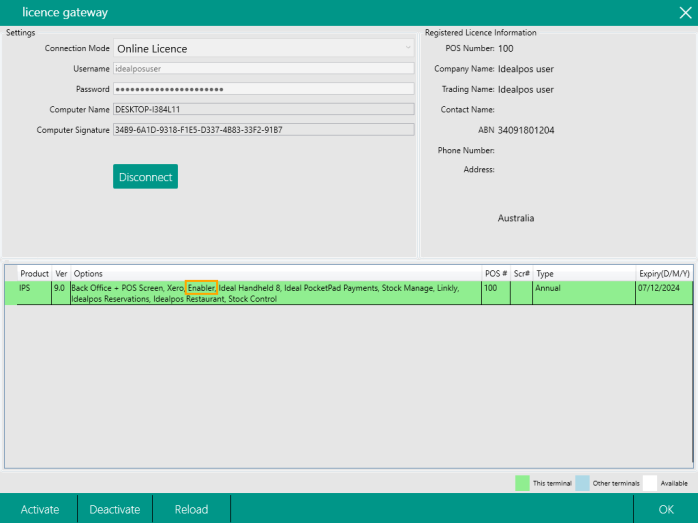
After the Enabler Embedded Interface has been purchased and enabled in the Licence, the Licence Gateway will need to be reloaded to access this functionality.
Go to: Back Office > Setup > Licence Gateway > Reload.
The "Enabler" module should appear next to each POS Terminal that has had the module enabled.
Close the Licence Gateway window.
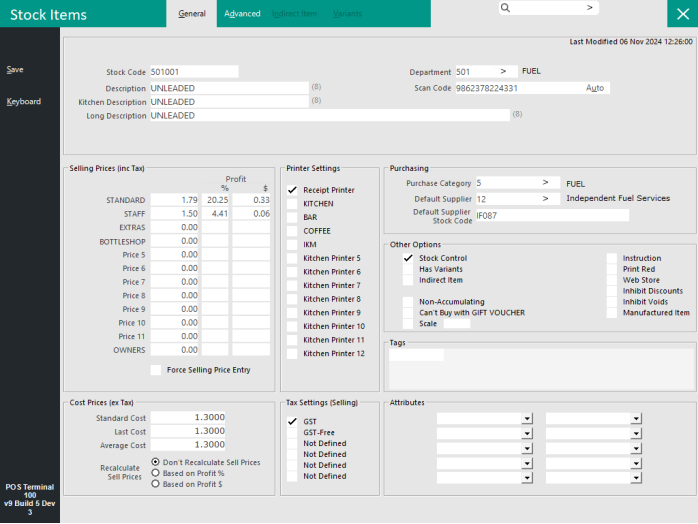
Each Fuel Grade (e.g. Unleaded, Premium Unleaded, Diesel, LPG, etc.) will need have a Stock Item.
Create a Stock Item for each Fuel Grade as outlined below:
Go to: Back Office > File > Stock Control > Stock Items > Add.
Note!
If a Fuel Department does not exist, it can be created by going to: Back Office > File > Sales > Departments > Add.
A Sales Category for Fuel may also be required which can be created by going to: Back Office > File > Sales > Sales Categories > Add.
A Purchase Category for Fuel may also be required which can be created by going to: Back Office > File > Purchases > Purchase Categories > Add.
A Supplier for Fuel may also be required which can be created by going to: Back Office > File > Suppliers > Suppliers > Add.
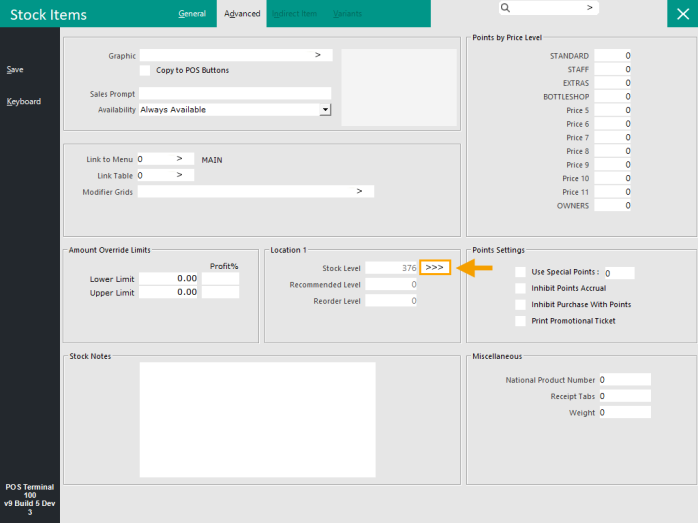
After creating the Stock Items for each of the Fuel Grades, you may want to set the Stock Levels for each Fuel Grade (if required).
This can be done in one of several ways.
The Fuel can be received in as a Purchase Order or Stock Received.
This is the preferred way of updating the Stock Level as the Purchase Order/Stock Receive will update Idealpos Reports and there will be a record of the fuel being received into the system.
Go to: Back Office > Transactions > Stock Control > Stock Purchases > Add > Select Purchase Type as Stock Received or Purchase Order and populate the required details > Enter the Fuel Grade Stock Items and quantity.
The Stock Received/Purchase Order can then be processed to receive the Fuel and update the Stock Level.
Alternatively, the Stock Level can be manually modified as outlined below:
Within the Stock Item, select the Advanced tab > Stock Level Field > Press the ">>>" button.
Enter the Stock Level, Recommended Level, Reorder Level as required > Press "Save" to save the change.
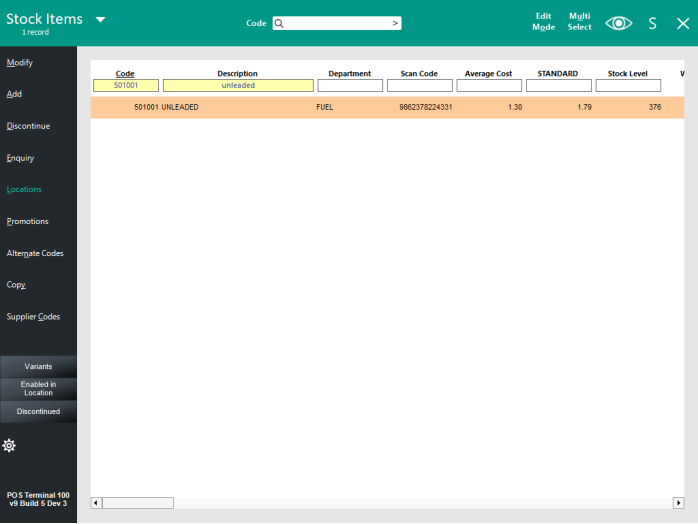
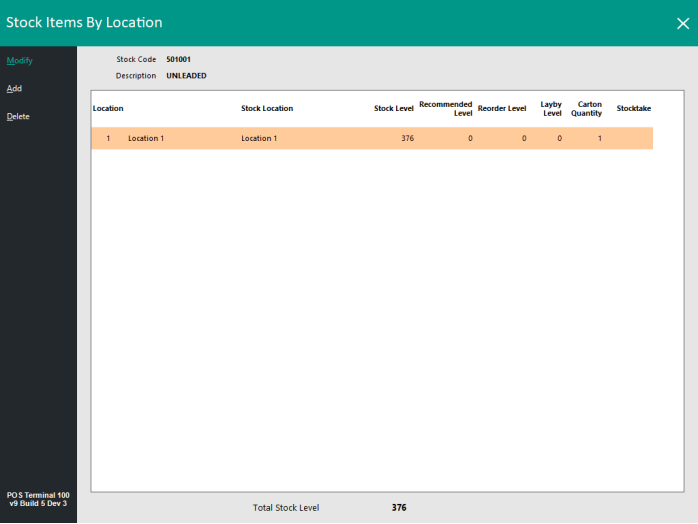
The Stock Levels for the Stock Item can also be accessed/modified by selecting the Stock Item from the Stock Items grid > Locations.
Select the Location > Modify.
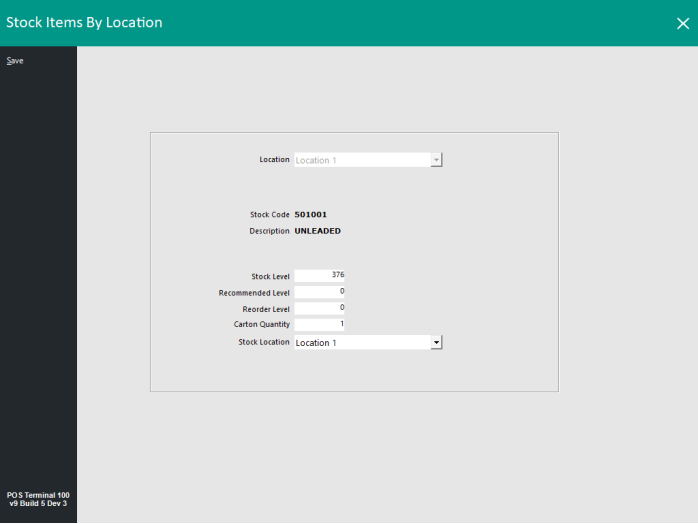
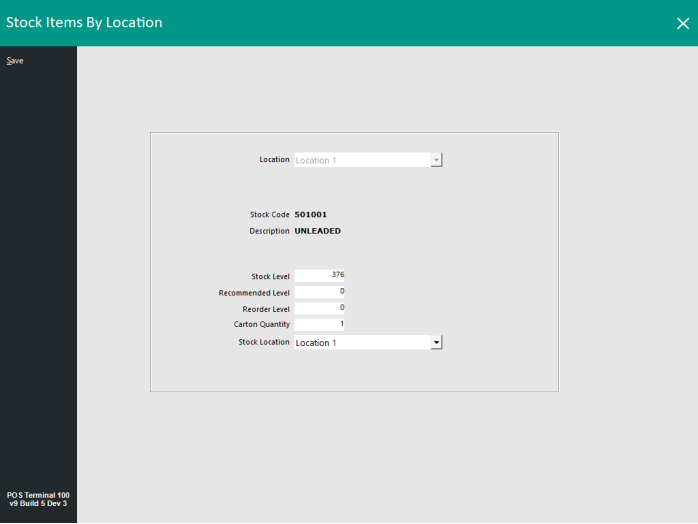
The Stock Items By Location window is displayed which contains the Stock Level details for the Fuel Grade.
Make any changes as required and press "Save" on the top-left corner.
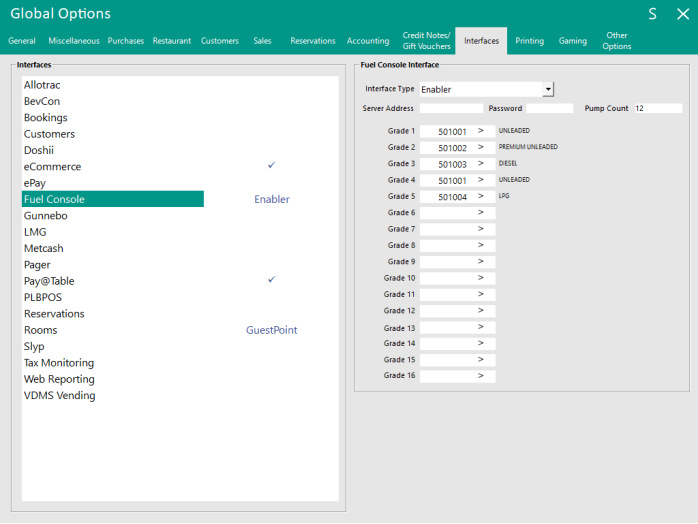
Go to: Back Office > Setup > Global Options > Interfaces > Fuel Console.
Close the Global Options window to save the changes.
In the event that someone fills up their car and drives off without paying, the sale will still need to be cleared from the Enabler.
This will be done via a Drive-Off Tender.
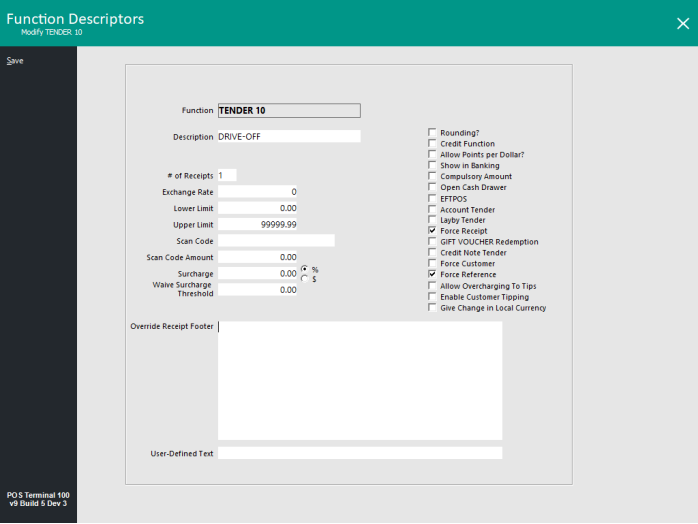
To configure the Drive-Off Tender, go to: Back Office > Setup > Function Descriptors > Locate the next unused tender type > Modify.
Tip!
Unused Tender Types will be labelled as TENDER ## (where ## is the number of Tender Function).
The Drive-Off Tender can be configured as required, however, a few suggested settings can be enabled if required:
After the Function Descriptor has been configured for the Drive-Off Tender, the Drive-Off Tender will need to be enabled on the POS Screen.
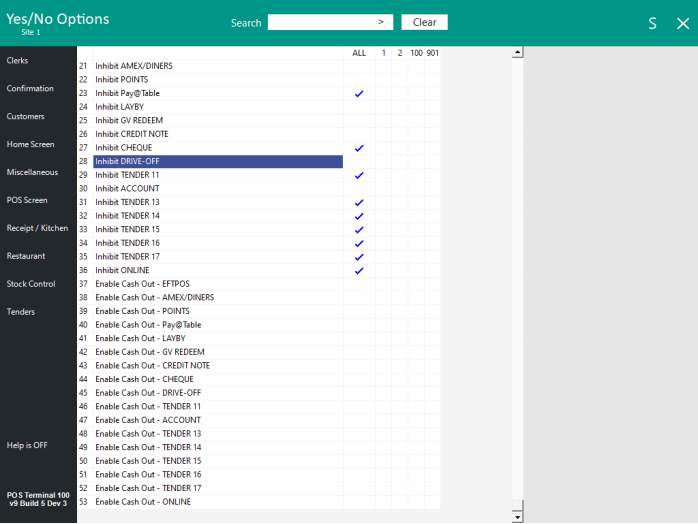
To enable it, go to: Back Office > Setup > Yes/No Options > Tenders > Uncheck the Inhibit DRIVE-OFF tender option.
The Enabler Embedded Interface supports all POS Screen Resolutions except for 1024x600.
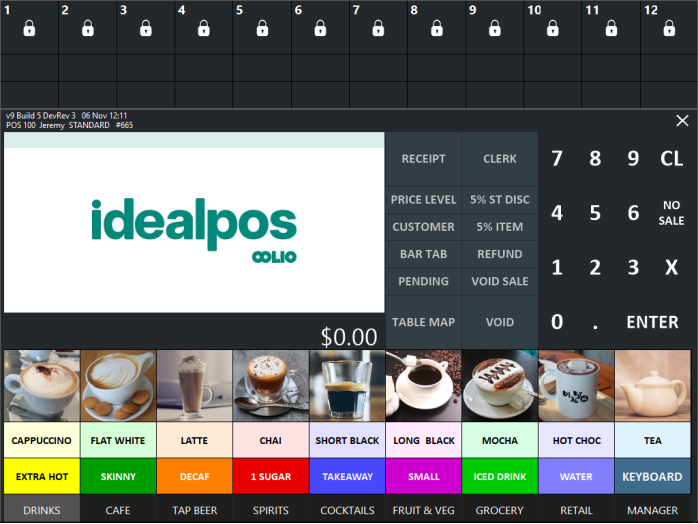
When the Enabler Embedded interface is configured, the POS Screen Grid area will be reduced (due to the top part of the POS Screen being reserved for the Enabler Interface).
This means that the POS Screen Grid may need to be re-configured and buttons re-created so that all the required functions and Stock Item buttons can be accessed.
The POS Screen Grid Layout can be configured by going to: Back Office > Setup > POS Screen Setup > Select POS Screen Layout > Buttons.
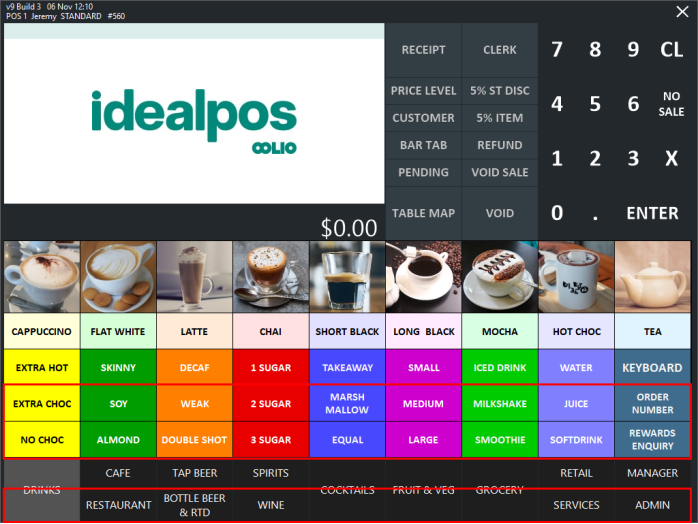
The two below examples show which areas of the POS Screen Grid will be inaccessible when the Enabler Embedded Interface is configured.
Below left is the POS Screen Grid shown on a 1024x768 POS Screen Resolution without the Enabler Interface (the areas of the POS Screen Grid that will be inaccessible are shown within the red rectangles).
Below right is the POS Screen Grid shown on a 1024x768 POS Screen Resolution with the Enabler Interface.
After the above steps have been completed, perform a Close Suite/Open Suite to save changes.
Go to: Start > Idealpos > IPSUtils > Close.
Start Idealpos via the Idealpos icon on the Windows desktop, or go to: Start > Idealpos > Idealpos.
The Enabler interface should appear at the top of the POS Screen.
This concludes the configuration of the Enabler in Idealpos.
For information about using the Enabler Interface, refer to Using Enabler Embedded with Idealpos.